I finished a DIY project! I repeat: I FINISHED A DIY PROJECT. (And it feels so good). I’ve had my eye on this one for a while… since I picked up those boring and plain wooden spoons, to be exact. I just needed to make sure that I had the time, patience and supplies to finally get started. Here’s how it went.

You need:
– wooden utensils
– paint (in as many shades as you choose!)
– a paint brush
– painter’s tape
Steps:
1. If they’re not already so, prepare your utensils to be painted. If they’re used, you might want to give them a good wash or even sand them down to make a smooth surface.

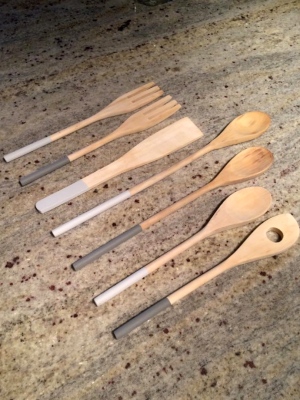
2. Decide how much of the spoon you’d like to be painted and seal this area off with painter’s tape. I made sure the area I painted was high enough up so that it wouldn’t interfere with cooking. But let’s be honest, these spoons will be used as decoration more than anything!

3. Get painting! I decided to use a mix of light grey and dark (Benjamin Moore‘s “Silver Chain” and “Dolphin”) to play it safe. But if you want a bright pop for your kitchen, choose coordinating colourful paints instead!
4. Wait for the paint dry. Mine was ready in about half an hour… yipee!
5. Carefully peel off the painter’s tape and admire your masterpiece!